NetFlow Post Installation Optimization Guide for Large Enterprises
By default, selecting NetFlow Analyzer in the Product Mode Selector enables all required configurations. However, for large enterprises with numerous routers and interfaces, additional optimization is necessary to ensure seamless performance.
Follow this step-by-step guide to enable and optimize configurations for large deployments:
Step 1: Initial Configuration
Select NetFlow Analyzer in the Product Mode Selector to enable default configurations.
Step 2: Update Toppers
- Set the toppers to display the required number of routers as needed.
👉 Go to Context default → profile0 → Counter Groups
Drilldown to Flowgens and check the checkbox to configure the topper count and update the following,
| Config | Value | Description |
|---|---|---|
| High watermark | 2500 | The maximum number of flowgens keys tracked |
| Low watermark | 2000 | When keys exceed the high watermark they are pruned down to this level |
| Top-K count | 2500 | Stores top k count in every topper bucket size interval |
And click Update.
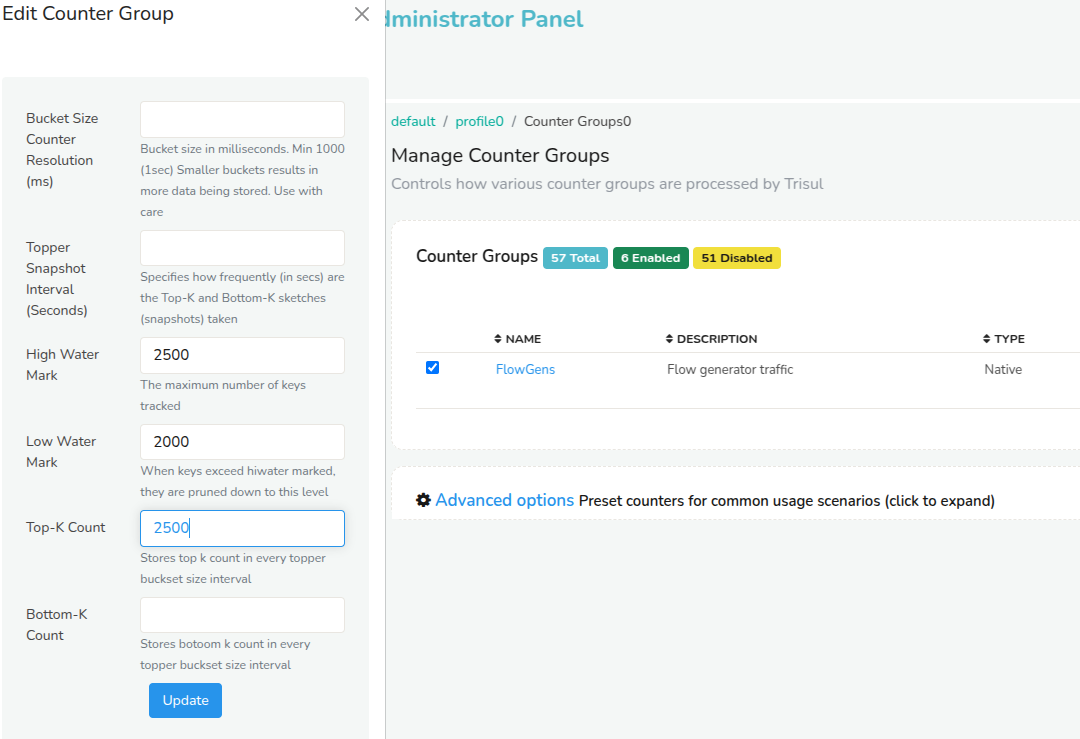
Figure: Sample value of the Flowgens Countergroup (Routers)
- Set the toppers to display the required number of interfaces as needed
👉 Go to Context default → profile0 → Counter Groups
Drilldown to Flowintfs and check the checkbox to configure the topper count and update the following,
| Config | Value | Description |
|---|---|---|
| High watermark | 10000 | The maximum number of flowintfs keys tracked |
| Low watermark | 9000 | When keys exceed the high watermark they are pruned down to this level |
| Top-K count | 10000 | Stores top k count in every topper bucket size interval |
And click Update.
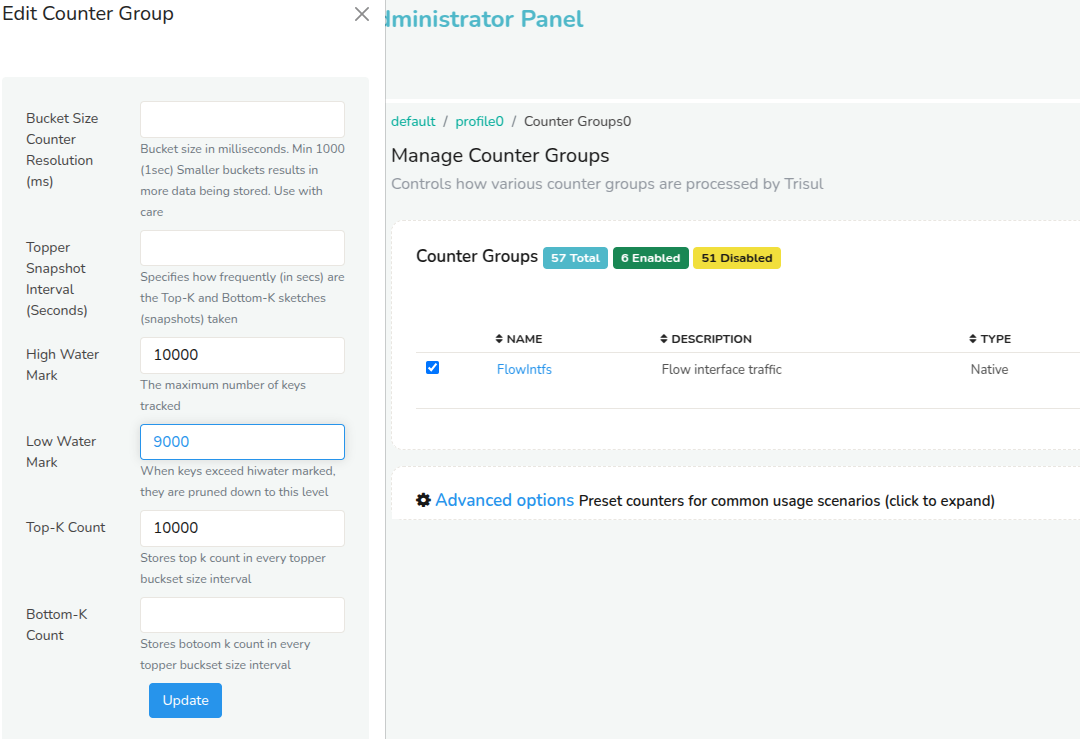
Figure: Sample value of the Flowintfs Countergroup (Interfaces)
- Set the toppers to display the required number of hosts,apps and interfaces (crosskey) as needed.
👉 Go to Context default → profile0 → Counter Groups
Search in the drilldown options for FlowIntf_bx and check the checkboxes of all the crosskeys as in the figure to configure the topper count and update the following,
| Config | Value | Description |
|---|---|---|
| High watermark | 50000 | The maximum number of keys tracked |
| Low watermark | 45000 | When keys exceed the high watermark they are pruned down to this level |
| Top-K count | 50000 | Stores top k count in every topper bucket size interval |
And click Update.
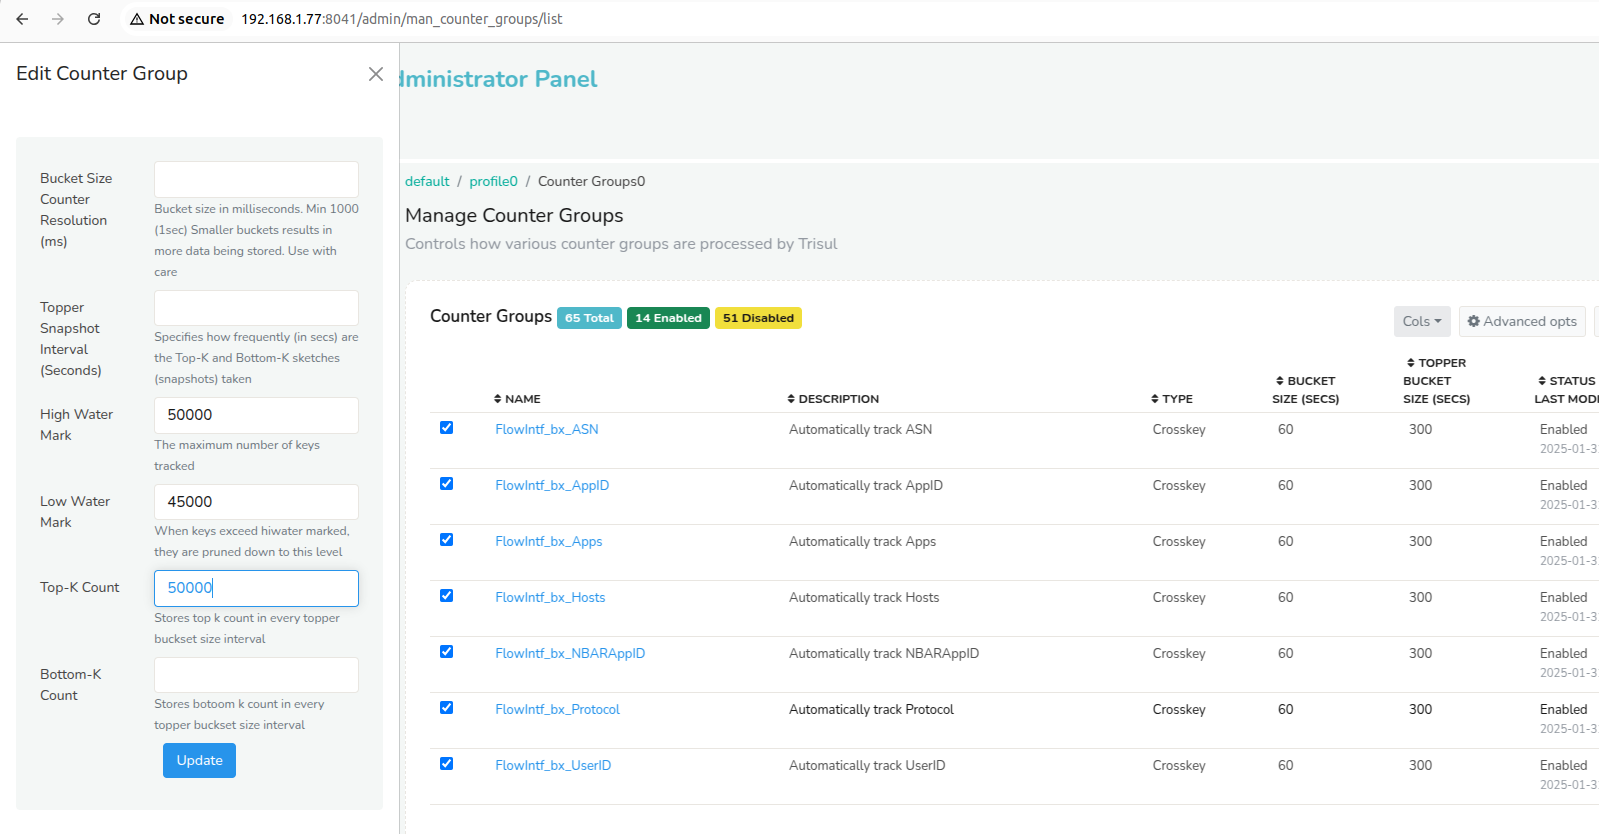
Figure: Sample value of the crosskey Countergroups
Step 3: Create Trackers
To enable trackers for interfaces, follow these steps,
👉 Go to Context default → profile0 → NetFlow Wizard → Interfaces
- Select a router from the drop down list to display the interfaces
- Click on the interface you would like to enable tracking or click on select all button above the list of all interfaces.
- Click Interface Tracking → Enable Interface Tracking which will open up the following screen as in the figure. Click Flow Tracker Only This will enable the flow trackers for all the selected interfaces.
![]()
Figure: Flow Tracker
Note that probe has to be restarted once the trackers are created
Step 4: Enable Alerts
Enable the Utilization Alerts as the system generates alerts when interface utilization exceeds the specified thresholds.
👉 Go to Context default → profile0 → NetFlow Wizard → Utilization Alert
- Set the threshold values according to utilization for High, Medium, and Low. Click Create.

Figure: Utilization Alerts
Note that probe has to be restarted once the alerts are created