Setup E-Mail
When you schedule a report, the email address to be "sent from" is configured in this Email settings. This section describes how you can setup an email account to send outgoing email reports and alerts.
Note: You need a valid SMTP email account (even Gmail will work).
How to Setup E-Mail
To open the Email Settings,
👉 Select Reports → Email settings
This will take you to the Email Server Account Settings page where you can configure the email address to be "sent from". For that, Click Configure Email Server button on the upper right hand side.

Figure: Email Account Settings Module
In this window, click Configure email server and fill in the following fields. WebTrisul uses this server to send outgoing mail.
| Fields | Description |
|---|---|
| Email Server | Hostname or IP of the SMTP server |
| SMTP Port Number | SMTP Port (Usually 25. For Gmail use 587) |
| Authentication Protocol | Click from the drop down list of authentication protocols |
| From Email Address | This is displayed as the sender's address on the recipient's inbox |
| Password/API Key | Email Password,API Key,or Provider password like pepipost,sendgrid |
| Disable SSL Cert verification | Disable certificate verification. Eg, if your email server uses self signed certificates |
| SMTP Relay User (optional) | Use this to send SMTP email via relays like sendgrid,mailchimp,pepipost etc. This is the user id given to you by the provider. Leave it blank if not required |
Newly Configured Email Address
Once you have configured the mail address by filling those fields, it will be displayed on the Email Server Account Settings page as in the following example.
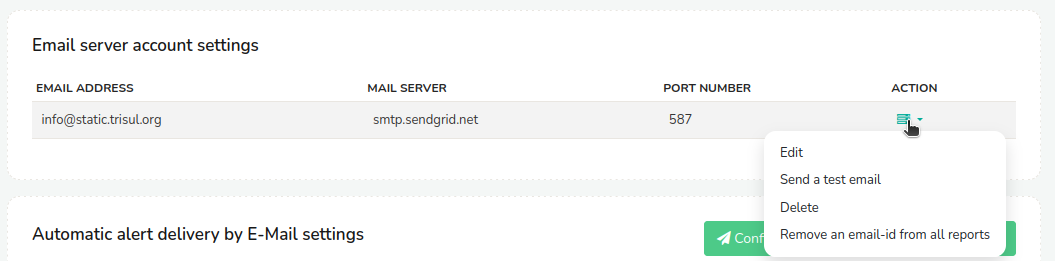 Figure: Newly configured email address
As you can see there are details of the newly configured mail address including email address, mail server name, port number, and an action button to perform functions on the configured mail address like Edit, Send a test email, Delete, and Remove an email id from all reports.
Send a Test Email
After you have configured the email settings, send a test email to check that everything works. You can click the Action button of the newly configured email address and click Edit.
The following edit window will open up where you can find a Test it! window on the right hand side of the page.
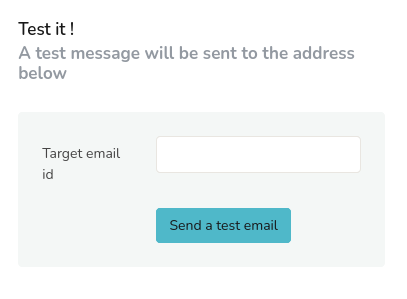
Figure: Test Email
Enter an email address on the “Target Email ID” and click Send a Test Email.
Configure Target Email Address
Once you have configured and tested the "sent from" address, configure the target email address that receives the scheduled reports.
To open Schedule Email Reports page, Login as admin and
👉 Go to Web Admin → Manage → App Settings → Schedule Email Reports
This will open up the following configuration for automatically emailing the scheduled reports.
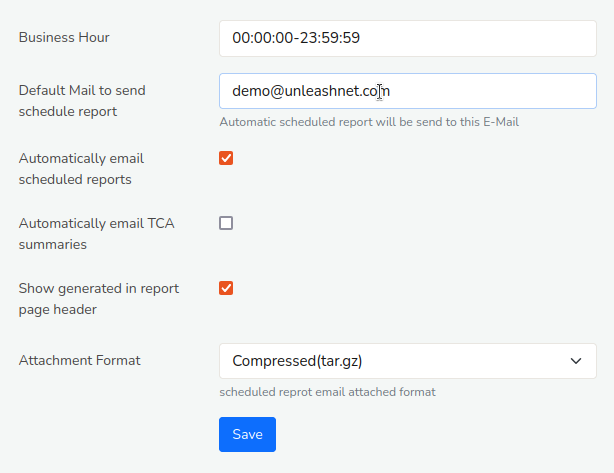
Figure: Schedule Email Reports
Provide details for the following fields.
| Fields | Description |
|---|---|
| Business Hour | Configure the business hours for the reports to include or exclude |
| Default Mail to Send Schedule Report | Enter the email address where you want the reports to be delivered |
| Automatically Email Scheduled Reports | Check this checkbox to automatically send scheduled reports |
| Automatically Email TCA Summaries | Check this checkbox to automatically send TCA Summaries |
| Show Generated in Report Page Header | Shows the report generated time in the page header |
| Attachment Format | Select a attachment format for the scheduled Report |
Once providing all the details, Click Save. You have now configured the default mail to send scheduled reports!
Pepipost Integration
WebTrisul supports Email sending with SMTP Relay provided by Pepipost.com. Here is how you use it.
Get Pepipost Credentials
Login to your Pepipost account and go to Settings > Integrations > SMTP Relay
Save the user name and password as shown in the picture below.
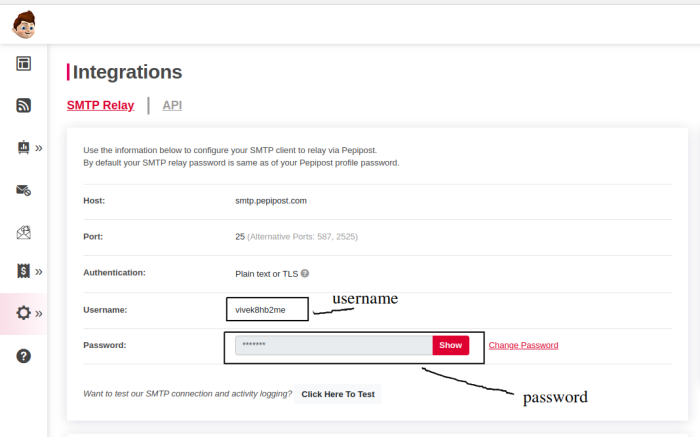
Figure: SMTP Relay in Pepipost Account
Configure Email Settings in Trisul
Enter the email settings as shown
| Fields | Description |
|---|---|
| Email Server | smtp.pepipost.com |
| SMTP Port Number | 587 |
| Authentication Protocol | Login SMTP Auth (default) |
| From Email Address | something@yourdomain.com. This domain integration must be completed in Pepipost first |
| Email Password | Pepipost SMTP Password (noted down from previous step) |
| Disable SSL Cert Verification | Unchecked |
| SMTP Relay User (optional) | Your Pepipost Username (noted from previous step) |
Then try sending a Test Mail.