Capture Adapters
A single instance of Trisul can listen on one or more network interfaces. This page describes how you can add or edit packet capture parameters for any profile.
View List of Capture Profiles
👉 Login as admin and Select Context : default → profile0 → Capture Adapters
By default, only eth0 is enabled. There are some other disabled entries for debugging purposes. If you want to listen on, say eth1 you can create a new profile and enable that one.
Create a New Capture Profile
Say you want to create a new network adapter for profile0 in context0.
👉 Select Context : default → profile0 → Capture Adapters Click Create Adapter
A form with the following fields are displayed
| Field | Description |
|---|---|
| Name | A unique name for this profile |
| Network Interface | The linux network interface name - such as eth0, eth1, wlan0 |
| BPF Filter | A BPF (libpcap/tcpdump) filter expression (see notes below on how to generate this for rxring mode - the default) |
| ERSPAN Interface | Decapsulate all ERSPAN packets on this interface. If this option is disabled, ERSPAN is counted as a single IP+GRE tunnel. |
| Add Ethernet FCS | Add 4 byte FCS to packet length. Use this option to reconcile with SNMP based counters. |
| Force Netflow Mode | Force this adapter into Netflow Mode - use this option if you want to use a mix of Netflow and Packet capture on a per-adapter basis. |
| Description | A short description of the profile |
Provider Specific Options
Trisul can capture packets in two “five modes”, Linux RX Ring , Libpcap , PF Ring , AF Packet, Napatech . You dont control the run mode here, but at the command line or by changing the application settings. The capture profiles work for all run modes, with one exception.
RX Ring

Figure: Configure RX Ring Mode
Number of blocks (2^N) Number of slots in the ring. Increase only if you need to
Libpcap

Figure: Configure Libpcap Mode
Promiscuous Mode
Usually set to true
Snap length
How many bytes of each packet to capture
PF Ring

Figure: Configure PF Ring Mode
PF Ring Cluster ID
Cluster ID to which this PF_RING socket is attached. (Numeric)
AF Packet

Figure: Configure AF Packet Mode
AF Packet FANOUT Group ID
AF Packet Fanout Group ID for flow based load balancing (Numeric <
1000)
Napatech
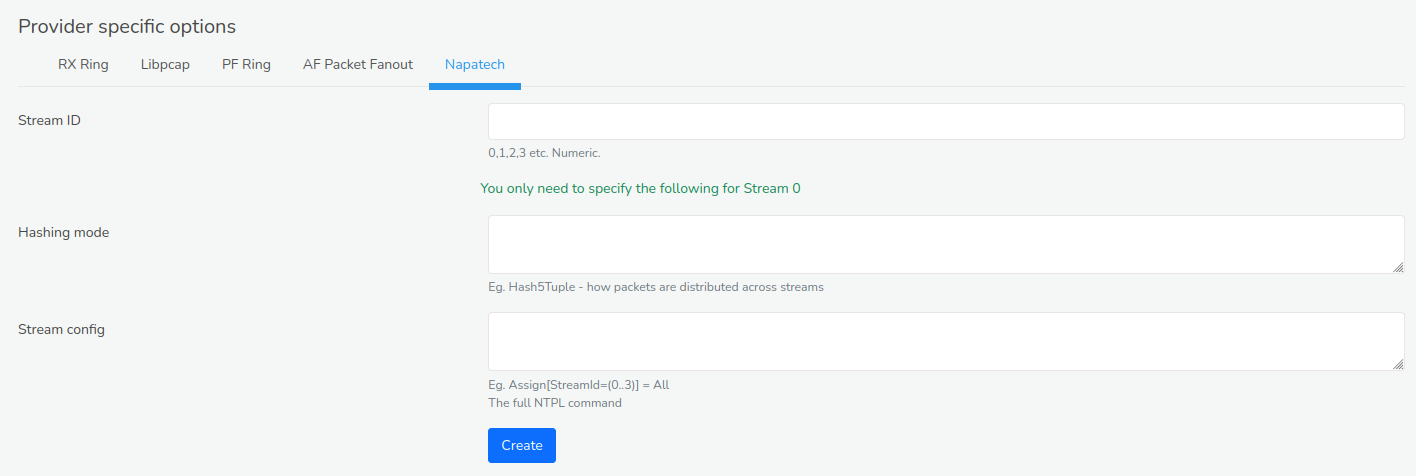
Figure: Configure Napatech Mode
Stream ID
Numeric number
Hashing mode
how packets are distributed across streams
Stream config
Full NTPL command.
Specifying a BPF Filter for AFPACKET and RXRING
👉 Select the active Interface and Click Create Adapter
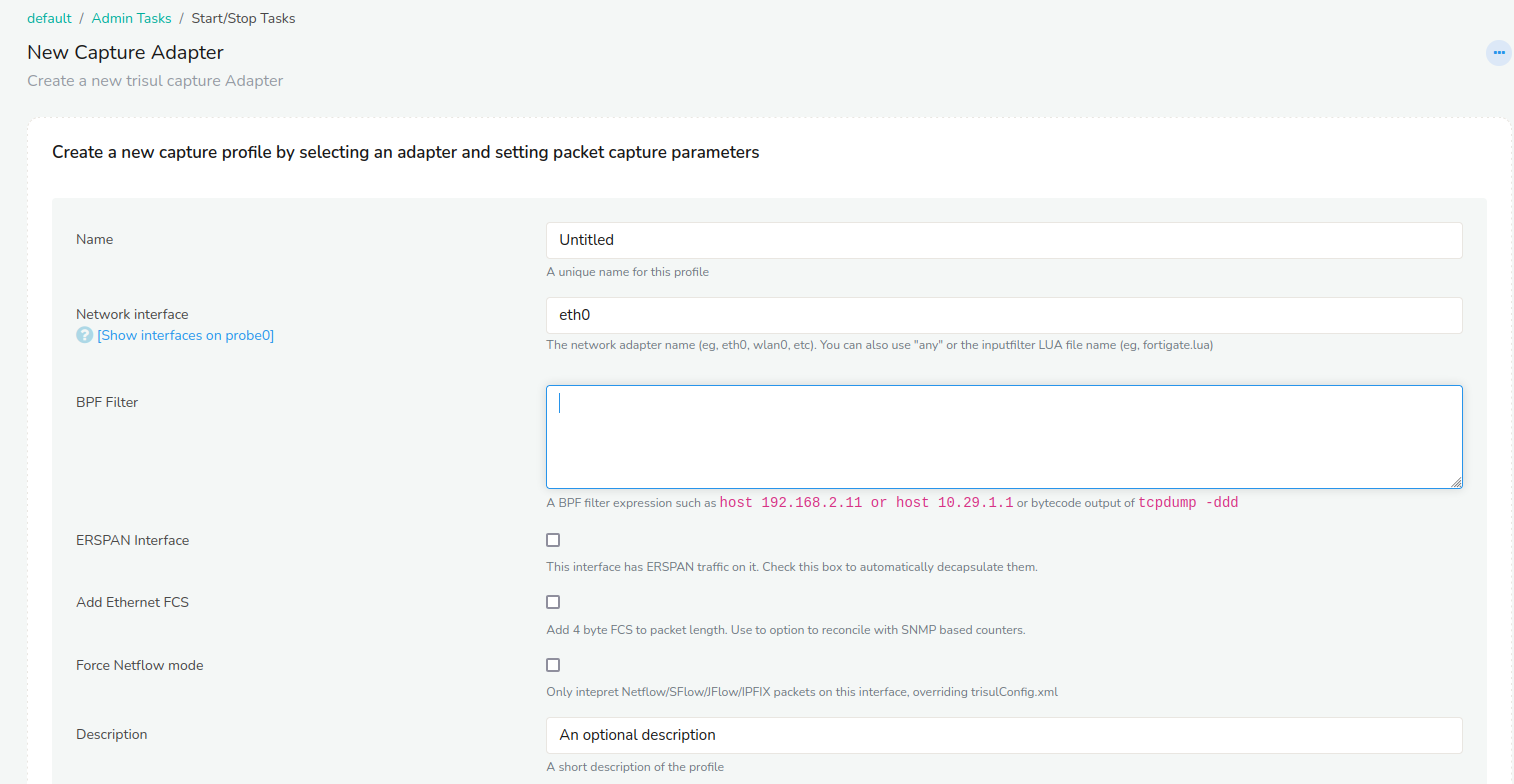
Figure: Configure New Capture Adapter
In the "BPF Filter" enter the expression such as host 192.168.2.11 or host 10.29.1.1 or bytecode output of tcpdump -ddd
Express Adapter Creation Wizard
Click on “Create Adapter” on the top right to quickly create capture profiles for flow based load balancing.

Figure: Showing Create Adapter Option in Adapter Creation Wizard
Quick Create Single Adapter
Select Quick create single Adapter to create a single adapter using an interface name
| Field Name | Description |
|---|---|
| Adapter name | Enter the network adapter name (eg eth0) |
Quick Create PF Ring
Select Quick create RF Ring to create a PF Ring capture profile with multiple streams for flow based load balancing
| Field Name | Description |
|---|---|
| Adapter name | Enter the network adapter name (eg eth0) |
| Number of streams | Number of flow balanced streams (eg 2, 4, etc) |
| Cluster ID | PF Ring Cluster ID you wish to assign to the streams (eg 999) |
Quick Create AF Packet
Select Quick create AF Packet to create AF Packet FANOUT based streams for flow based load balancing.
| Field Name | Description |
|---|---|
| Adapter name | Enter the network adapter name (eg eth0) |
| Number of streams | Number of AF FANOUT streams for flow based load balancing (eg, 2,4,etc) |
| Fanout Group ID | AF Packet Fanout Group ID for flow based load balancing (Example 999) |
Enable or Disable the Profile

Figure: Enable/Disable all
- Click Enable All or Disable All on the top right hand side to enable or disable all adapters.
When you click Enable All or Disable All adapters, the system will prompt you to restart the probe. Make sure to complete the restart to ensure the changes take effect.
Edit the Profile
Click the action button against any interface and a dropdown menu shows up Enable, Edit, and Delete options in the Profile list.
- Enable: Click enable to enable the selected interface.
- Edit: Click edit to modify the adapter configuration.
- Delete: Click delete to delete the selected interface.
Bulk Edits
Click on the checkboxes of the interfaces you want to edit in bulk and the following options appears as in the figure.
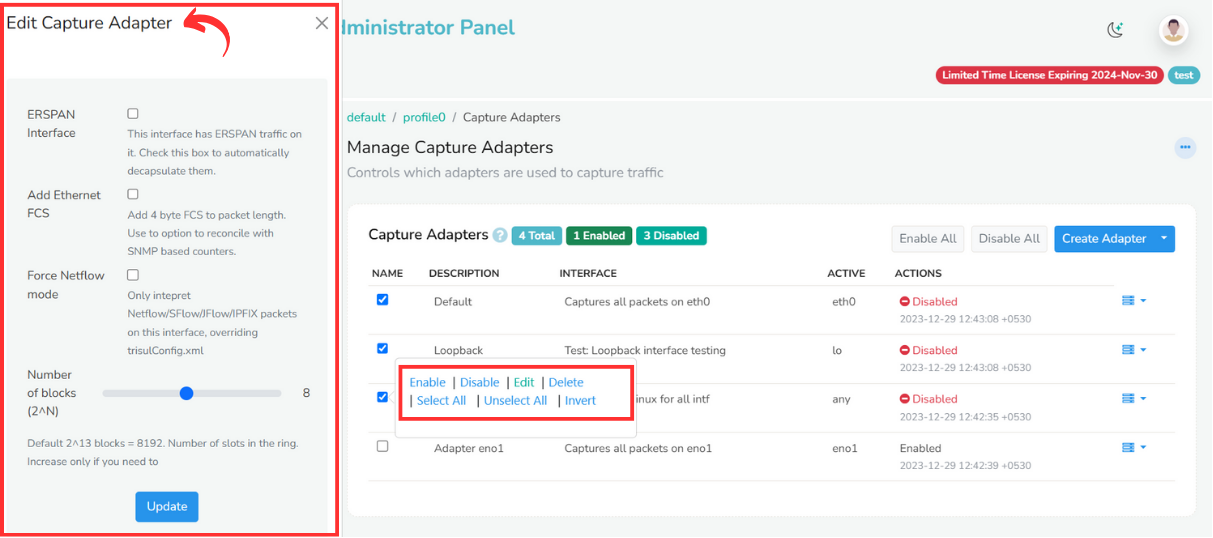
Figure: Showing bulk edit options
| Options | Descriptions |
|---|---|
| Enable | Activates the chosen interfaces, allowing them to function and interact with users or systems as intended. |
| Disable | Deactivates the selected interfaces, temporarily halting their functionality and interaction with users or systems. |
| Edit | Opens a bulk editing interface "Edit Capture Adapter" on the left side as shown in the figure to modify settings of the selected interfaces simultaneously. (Options in "Edit Capture Adapater" is the same fields as in the "Create Adapater") and click Update. |
| Select All | Automatically checks all available interfaces, enabling you to apply bulk actions (enable, disable, edit) to every interface at once. |
| Unselect All | clears all previously selected checkboxes, resetting your selection and allowing you to start fresh. |
| Invert | Toggles the selection status of all interfaces. Checked boxes will become unchecked, and unchecked boxes will become checked, providing a convenient way to quickly reverse your selections. |