Name Resolution
You can assign a user friendly name for any type of item.
Manually Assign a Name
You can assign names to keys in four ways:
From the Key Dashboard
This is the easiest way to edit. You can come to the key dashboard by clicking on a link or by searching for a specific item.
-
You can also edit by clicking the link on the IP or Port from any module or table
-
You will be redirected to Key Traffic dashboard
-
Find the module Key Details and click the “Set Label/Edit” from the menu.
From Top Keys
Use this if you want to see recently active keys and assign them names in one page.
👉 Select Customize → Show All→ Keys
-
List of counter groups will appear
-
Click the show recently active option against any counter group
-
You will get list of keys and click the edit icon against any key you would like to edit
-
You will be redirected to a page with following fields
| Field Name | Description |
|---|---|
| Key | A unique identifier for the entity. |
| Represents | Represents this human readable identifier |
| Name | A user friendly name for this key. Examples: Host names for IP Addresses, Application names for port numbers, etc |
| Description | More information about this entity. This doesn’t show up anywhere except in the key details panel. |
| Valid From | Statistics before this time are not shown |
| Attributes | One attribute per line Example a=b |
Resolve Keys in Bulk from CSV file
👉 Select Customize → Show All→ Keys
List of counter groups will appear
-
Click the Import from csv from the option button against any key
-
Upload a csv file
-
Select the column numbers that contain the key and label
-
Click Import CSV File
Set/Edit Label
Click on the drilldown option against any key from any dashboard as in the figure. And click Set/Edit Label.
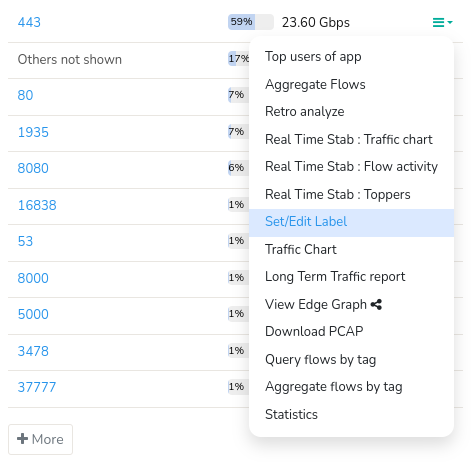
Figure: Set or Edit Label
Set the label name in the box prompted "Edit User Label".
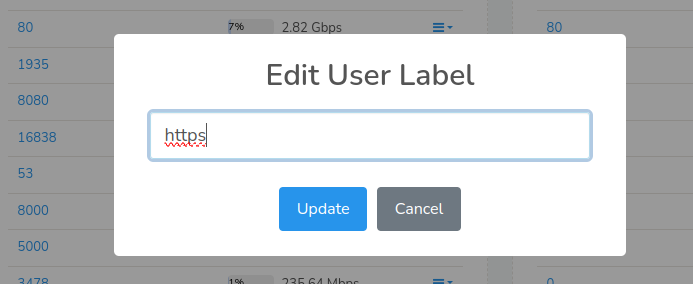
Figure: Update Label
And click Update.
Automatic Name Resolution
Trisul comes with a sophisticated way to resolve keys automatically in the background. It resolves only those keys which are likely to be “interesting”. The process is designed to place as little load on your DNS servers as possible.
Automatic name resolution is enabled by default.
Turn Automatic Name Resolution On or Off
Automatic resolution is controlled by the Enable parameter in the ResolveIP section of the hub configuration file. To turn it off, set Enable to FALSE.
Export Labels to CSV file
You can export assigned labels to csv file
👉 Select Customize → Show All→ Keys
-
List of counter groups will appear
-
Click the Export to CSV from the option toolbar against any counter group
Troubleshooting
If for some reason you are not able to see hostnames in Trisul, try these steps.
- Check if there are any errors in the log. Go to Admin → Web server logs → Background Tasks Log
- Check if crontab is enabled. Type
crontab -lto check entries - Check if DNS works, click on any IP to bring up key dashboard, then click on Resolve